


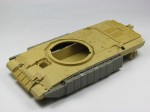
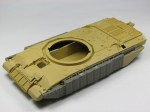
Once the top and bottom hull pieces were joined the next major pieces to fit were the explosive reactive armour on the front glacis plate and the Chobham armour along the sides. As has been noted [1] the kit pieces here – especially the armoured side plates – are not very accurate. I thought I would try to swap them for the Accurate Armour Challenger 1 extra armour set (C019). In the end, I only used the pieces for the side plates. One of the big side armour parts was somewhat deformed. It was only apparent how much so once it was in situ and fairly impossible to remedy. It is no disaster, but it will be best to photograph and display the finished model from its good side! It would be nice if a newer plastic model of this tank – with accurate pieces out of the box – could be produced by one of the major companies, instead of endless Panzer variants. Yeah, I know what sells more…
References
1. Modelling the Challenger 1 and 2 MBT and Variants, Graeme Davidson and Pat Johnston, Osprey Publishing, 2006. (link)

Leave a comment