

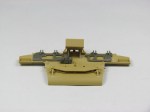

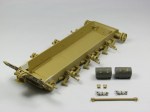

I wanted to use the Accurate Armour fuel tank conversion set (C020) as well as parts of the Eduard photoetch set. This required a good deal of plastic cutting and sawing, filling, sanding, resin parts clean up and metal bending! It is about half finished – the upper hull must be attached before I can do the rest. I hope that it will look good in the end.

Leave a comment