

Painting
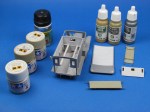
- Following spraying of Tamiya “Fine Surface Primer” (light grey), I sprayed the floor and other parts with a mixture of 90% Tamiya “Deck Tan” (XF-55) and 10% Tamiya X-22 Clear in Mr.Color Leveling Thinner (1:2 paint:thinner). Once dry, AK Interactive “Worn Effects” (AK088) was painted with a brush in two coats, about an hour apart, to the areas previously spray painted. An hour later a 1:2 mixture of Tamiya “Flat White” (XF-2) and Mr.Color Leveling Thinner was sprayed over the entire interior, to be repeated an hour later.
- Once the white colour was dry, I simulated some scratches or chips in the white paintwork, to reveal the wood colour underneath, by selectively brushing water onto certain areas and removing some of the paint using a brush.
- The underside of the roof, and back doorof the vehicle were also sprayed white. The stretchers were painted with Tamiya “Buff” (XF-57), Vallejo Panzer Aces “Old Wood” (310) and Vallejo “Natural Steel” (70864).
Weathering
- Apart from the paint chipping described above, the only other steps here were selective treatment of the floor and walls with a dilute mixture of Winsor & Newton “Raw Umber” in enamel thinners to simulate general grime and a mixture of Humbrol “Gloss Cote” in enamel thinners painted onto parts of the floor, to represent damp stains.
A box, bucket and stowage roll from my spares were added, the glass pieces fitted and masked and the interior sealed up by adding the roof and back door.

Leave a comment