
- Before going any further I had to tone down the glossy surface. A 1:2 mixture of Mr.Color “Flat Clear” (182) and Mr.Color Leveling Thinner was sprayed over the entire model. This produced a good matt finish with no hint of any white residue which I have sometimes had in the past when using other matt varnishes. I continue to be impressed with this line of paints – they have been around for a while I think but I have only started to use them, so am a late convert.
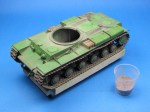
- A 1:1 mixture of Tamiya Acrylic XF-57 “Buff” and XF-52 “Flat Earth” in Tamiya X-20A thinner (10% paint mixture in thinner) was sprayed on the lower half of the hull, the suspension, wheels and selective parts of the upper hull.
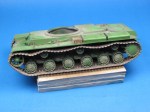
- At this stage I added a few stowage items which I had around, mostly from Value Gear.
- A mixture of medium pigments was brushed onto the lower side of the hull, wheels, select parts of the upper hull and parts of the turret top. They were then loosely fixed in placed by the application of enamel thinner either by brush or misting from a distance with the airbrush. When dry, any unwanted, excess amounts of pigments were brushed away.
- I envisage this vehicle being present in the early stages of Operation Barbarossa (summer 1941), prior, no doubt, to being abandoned or knocked out. Thus, I was going for a dry, dusty appearance, not including any clumps of wet mud or large amounts of dirt spatter. It is sort of a companion piece to the KV-1, a vehicle of the same time.

Leave a comment