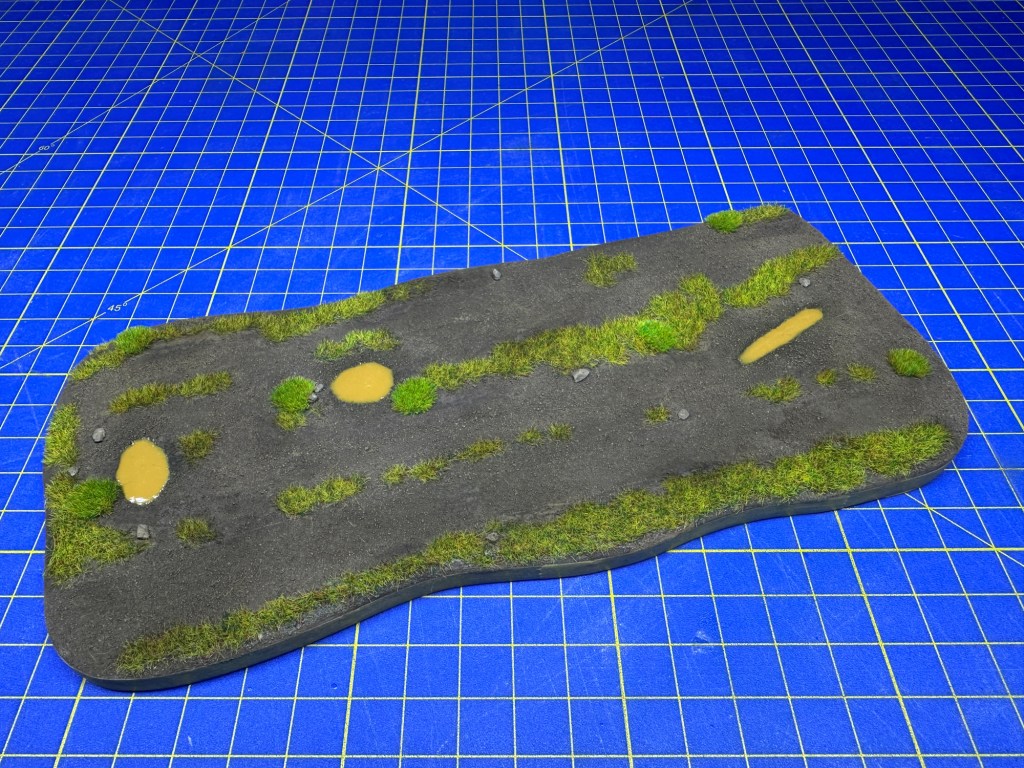

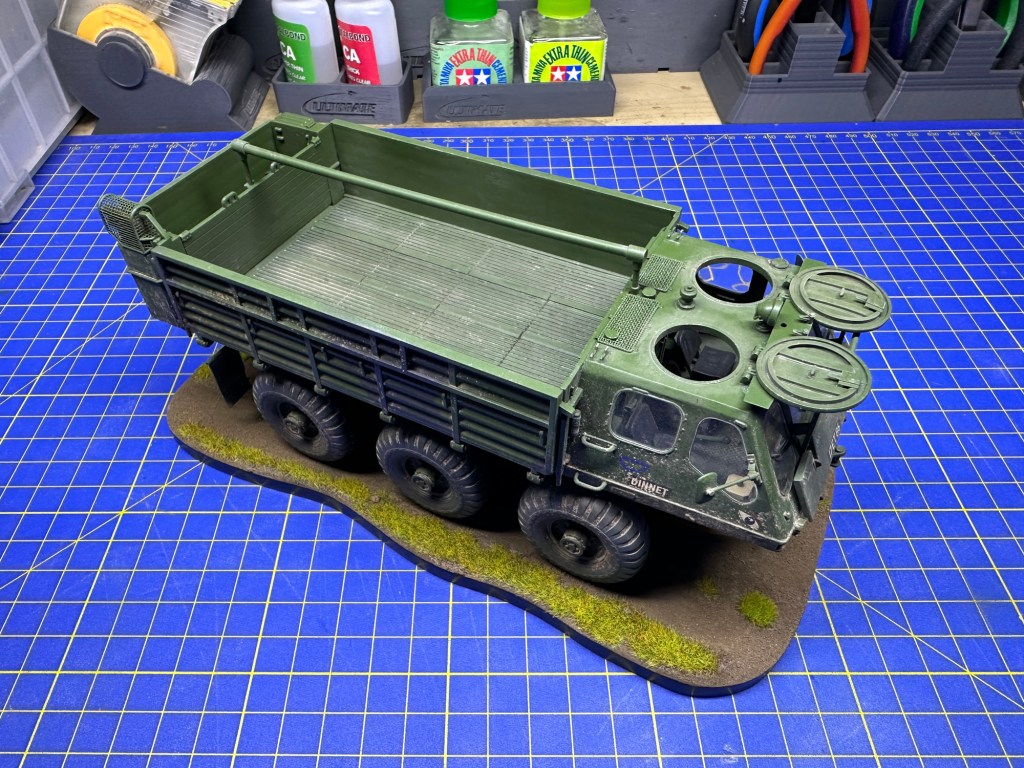
I am trying to improve my diorama or, at least, vehicle base building skills. So, having cut a shape from a 6mm board, I applied a thinner layer of DAS Clay. I pressed the Stalwart into the clay before it set, to get an impression of the wheel locations. Once dry, I extended these locations into shallow channels for the wheels to rest in. I further carved out various bumps and hollows in it. After this, I applied white glue and then a ground mix – I think from Treemendus. Next I painted a dark brown colour on this, and then sprayed patches of a lighter brown. White glue was brushed on in patches and 2mm static grass sprinkled on it, using a grass applicator from https://www.wwscenics.com/. A few tufts and stones were then placed on the ground, to create further variation. I used oil paint mixtures – mostly flicked from the end of a brush – to create darker patches, Finally, a water product, mixed with an acrylic brown paint, was applied to three of the hollows to create puddles. I had to do this several times due to the shrinkage of it during drying. The base edges were painted with black and the vehicle seated nicely on it. Overall. I am happy with my effort…

Leave a comment