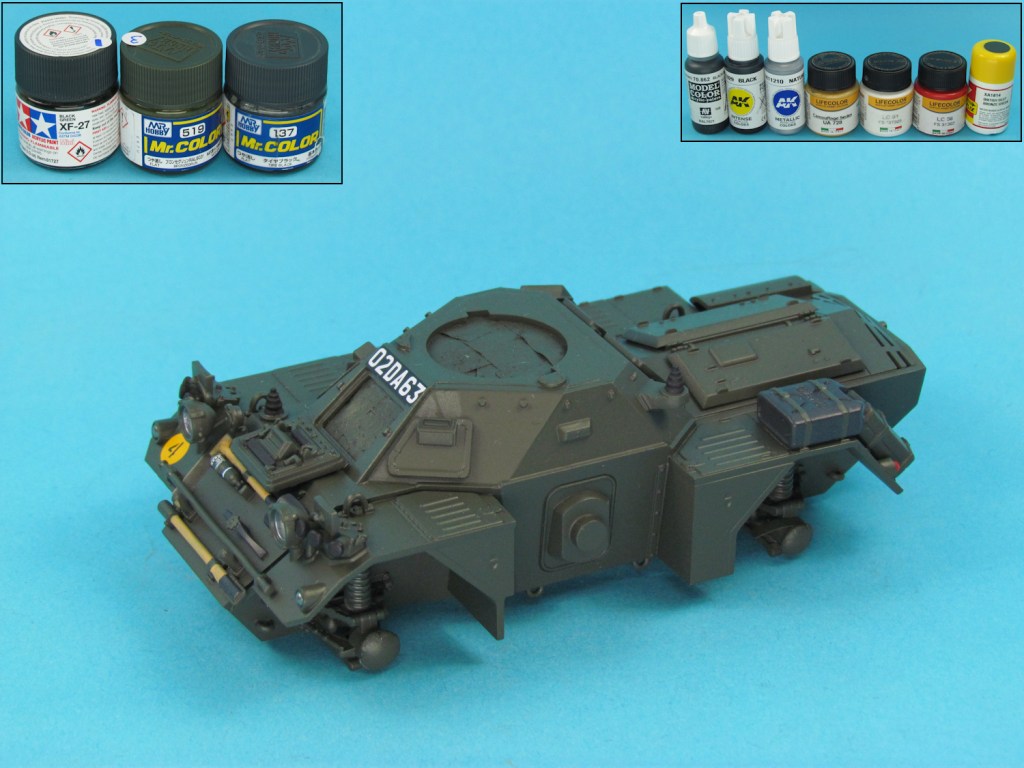

Primer: Tamiya “Fine Surface Primer” (light grey) spray can.
Base coats: In all cases the paint was sprayed as a 1:2 mixture in Mr.Color leveling thinner.
- Tamiya “Black Green” (XF-27)
- Tamiya “Black Green” (XF-27) and Mr.Color “Bronze Green” (519) in a ratio of 1:3. The Tamiya colour looked too dark on its own, so I used the Mr.Color to lighten it. I am not sure if the result is an especially close representation of the colour used by the British Army post-war, but it is good enough for me.
Details:
- Wheels: Mr.Color “Tire Black” (137), with wheels nuts painted with LifeColor “Red” (LC06) or “White” (LC01). This seemed to be a common thing at that time and place.
- Machine gun: AK Interactive “Black” (11209)
- Tools: Panzer Aces “Old Wood” (310), Vallejo Model Color “Black Grey” (70862)
- Fire extinguisher: Xtracrylix “British Deep Bronze Green” (XA1814)
- Water can: Vallejo Model Color “Black Grey” (70862)
- Fuel can: Xtracrylix “British Deep Bronze Green” (XA1814)
- Aerial mounts, smoke grenade caps: AK Interactive “Black” (11209)
- Headlights, spotlight and mirrors: AK Interactive “Natural Steel” (11210)
- Rear lights: LifeColor “Red” (LC06)
A 1:2 mixture of Mr.Color “Clear Gloss” (46) and Mr.Color Leveling Thinner was sprayed over the entire model and the decals applied. Gloss was reapplied to the areas with decals, in order to protect them for subsequent stages.

Leave a comment